Version Control
Introduction
Version Control is a key component of Machine Learning Operations (MLOps). It allows for understanding of where models come from as experimental parameters are iterated through. It enables easy access to the best models based on well-documented evaluation techniques.
To enable version control, this project utilizes two tools.
I. MLFlow
MLFlow is a platform for managing machine learning lifecycles. As projects grow along with datasets, scientists can often grow overwhelmed by the number of parameters that need to be tracked to understand the training, inference, and performance of any given model in their project. The purpose of MLFlow in CARE for FLAME is to provide infrastructure to track these parameters and simplify decision-making in choosing a model for FLAME image denoising in the clinic.
MLFlow will be installed as a part of the care Conda environment built in either of the install tutorials.
Once MLFlow is installed, it can interface with any model repository. MLFlow model storage is split into metadata and artifact storage. While both can and will be stored in Synology Drive in this project, each has their own range of possibilities. See backend and artifact stores for more information.
II. Synology Drive
To enable file sharing, this project was built and tested using Synology Drive. While MLFlow can detect and use models in any location on the local machine’s filesystem, Synology Drive enables someone on one computer to train a model which then gets automatically synced with another machine that has the same Synology Drive folder mounted on their filesystem. Therefore, Synology Drive enables synced model training and sharing for all members of Balu Lab.
1. Synology Drive Mount
To mount Synology Drive, download the Synology Drive Client
Once downloaded, create a Sync Task.
Add the Synology Drive server using the IP provided by other members of Balu Lab.
Hit Create and ensure that the NLOM-DATA/CARE_for_MATLAB/mlruns folder is mounted to your machine:
* If NLOM-DATA is mounted, then all directories within NLOM-DATA will appear in a new SynologyDrive folder
on the machine.
If
NLOM-DATA/CARE_for_MATLABis mounted, then all directories withinCARE_for_MATLABwill appear in theSynologyDrivefolder.
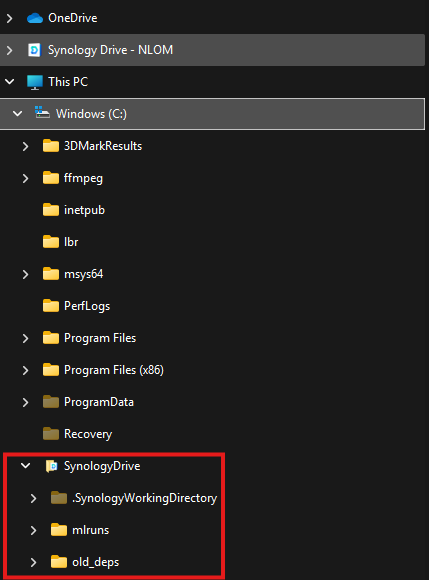
Assuming that NLOM-DATA/CARE_for_MATLAB was mounted, and the following was selected in Sync Rules:
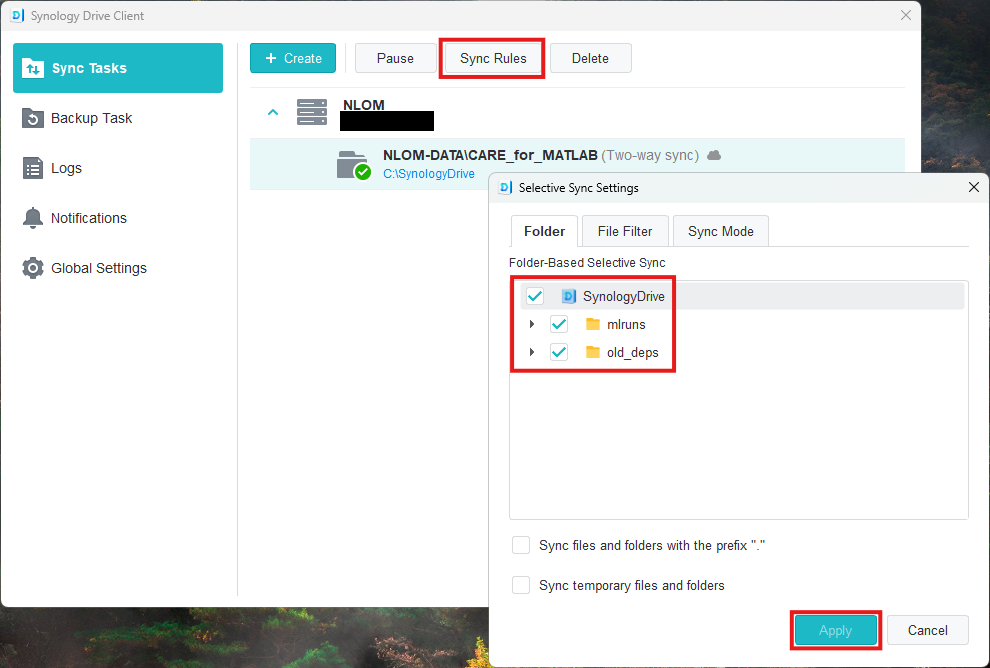
Then the user would see the following in their file tree:
2. MLFlow
To download MLFlow, follow the instructions for setting up the care conda environment in the /training for details.
a. Starting Tracking Server
In your command-line interface, navigate to the folder where the flame-care repository is installed and the flame
module is accessible.
With the care conda environment active, run the following command:
python start_mlflow_server.py --ip 127.0.0.1 --port 5050 --tracking-direc </path/to/CARE_for_MATLAB/mlruns>
⚠️ DO NOT USE mlflow server COMMAND-LINE API TO START MLFLOW TRACKING SERVERS
Using the mlflow server command-line API for Balu-Lab CARE purposes risks permanent deletion of all models in
the Synology Drive mlruns folder. This is because using the mlflow server API with local directories was not designed
for servers that can be mounted on multiple machines at different locations like Synology Drive.
Please use start_mlflow_server.py as indicated above instead, which has a few built-in workarounds to prevent
this issue.
⚠️ Server processes must be deleted
start_mlflow_server.py lacks the capability of determining the Python subprocess that hosts the MLFlow server. Without
killing the process in-between the creation of servers, the user could find themselves with many MLFlow servers being
hosted at once.
To prevent this, the server processes must be killed manually.
On Windows, open Task Manager and scroll past “Background Processes”. Find Python processes and hit “End Task”
On WSL / Linux, type:
ps -a
Find the PID of the first python process after the mlflow process:
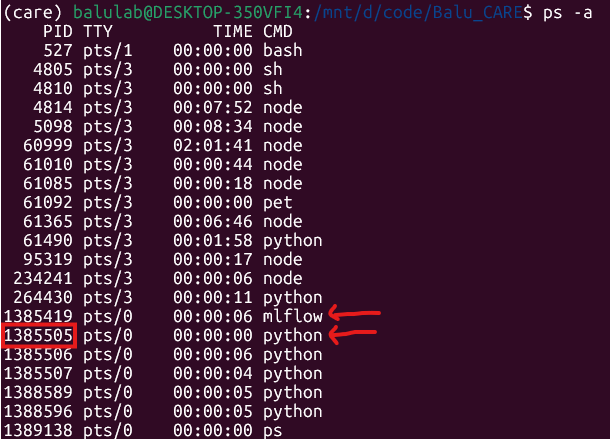
Then, kill the process:
kill <PID>
b. Viewing Stored Models
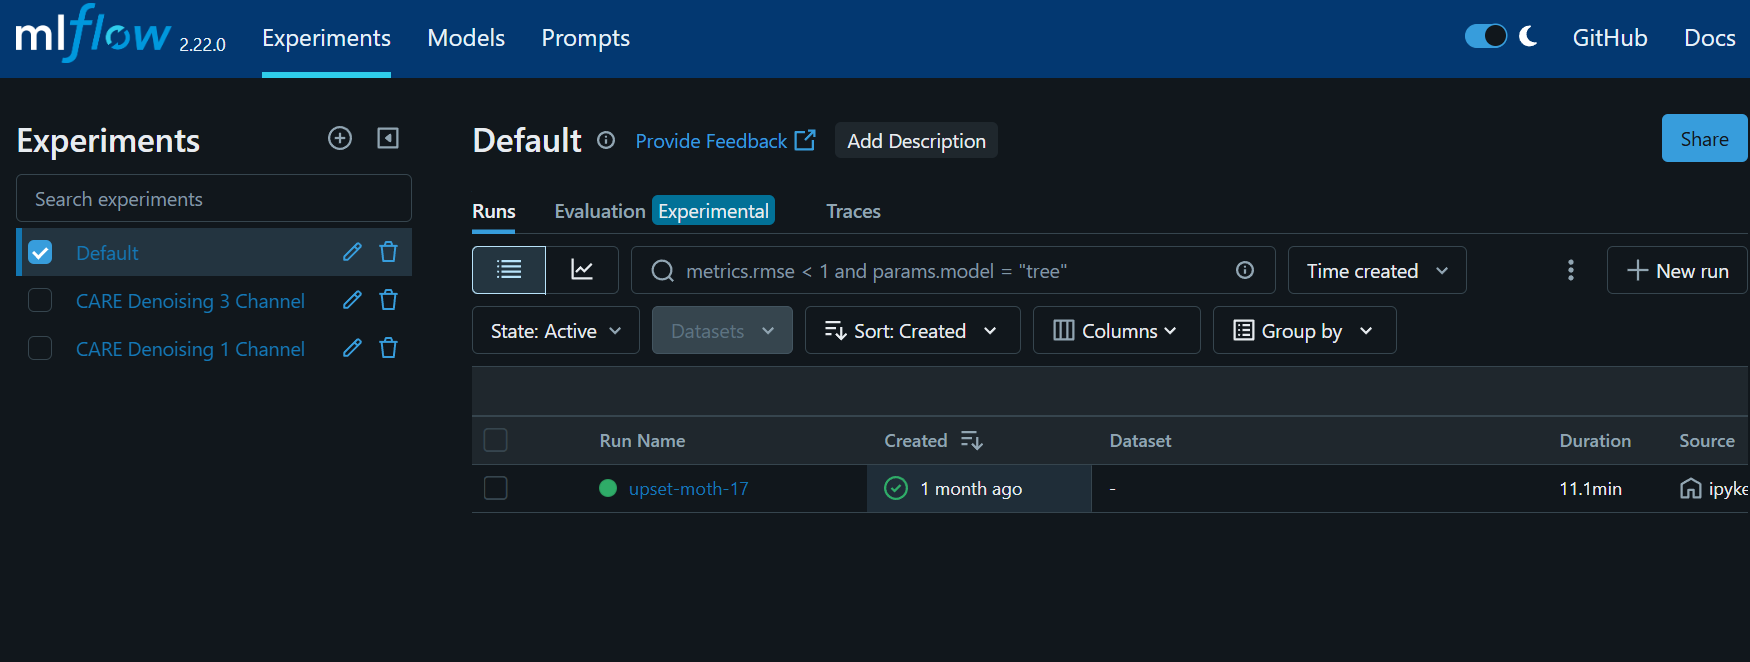
Once the tracking server has been started, it can be accessed through a web browser. Use the following as the web address:
127.0.0.1:5050
The MLFlow server GUI will appear:
c. Model Registry
The Model Registry is the database within MLFlow that tracks models that are ready for deployment. For a model to be
used for inference by CARE_on_image.py, it must exist within the model registry.
Types of stored models:
MLFlow runs are each model in their most raw format. These can be found in the GUI
Experimentstab. Here, model metaparameters are stored along with their artifacts. Artifacts are not stored here by default, but the server is set up usingstart_mlflow_server.py, they will appear under theArtifactstab once a run is clicked on. Read more.MLFlow registered models are formalized models that are ready for deployment. Registered models are not duplicates of model runs. Instead, registered models contain a dictionary mapping specific versions of the deployable model to specific MLFlow Run IDs where the model can be found. Read more.
Registering a model of interest:
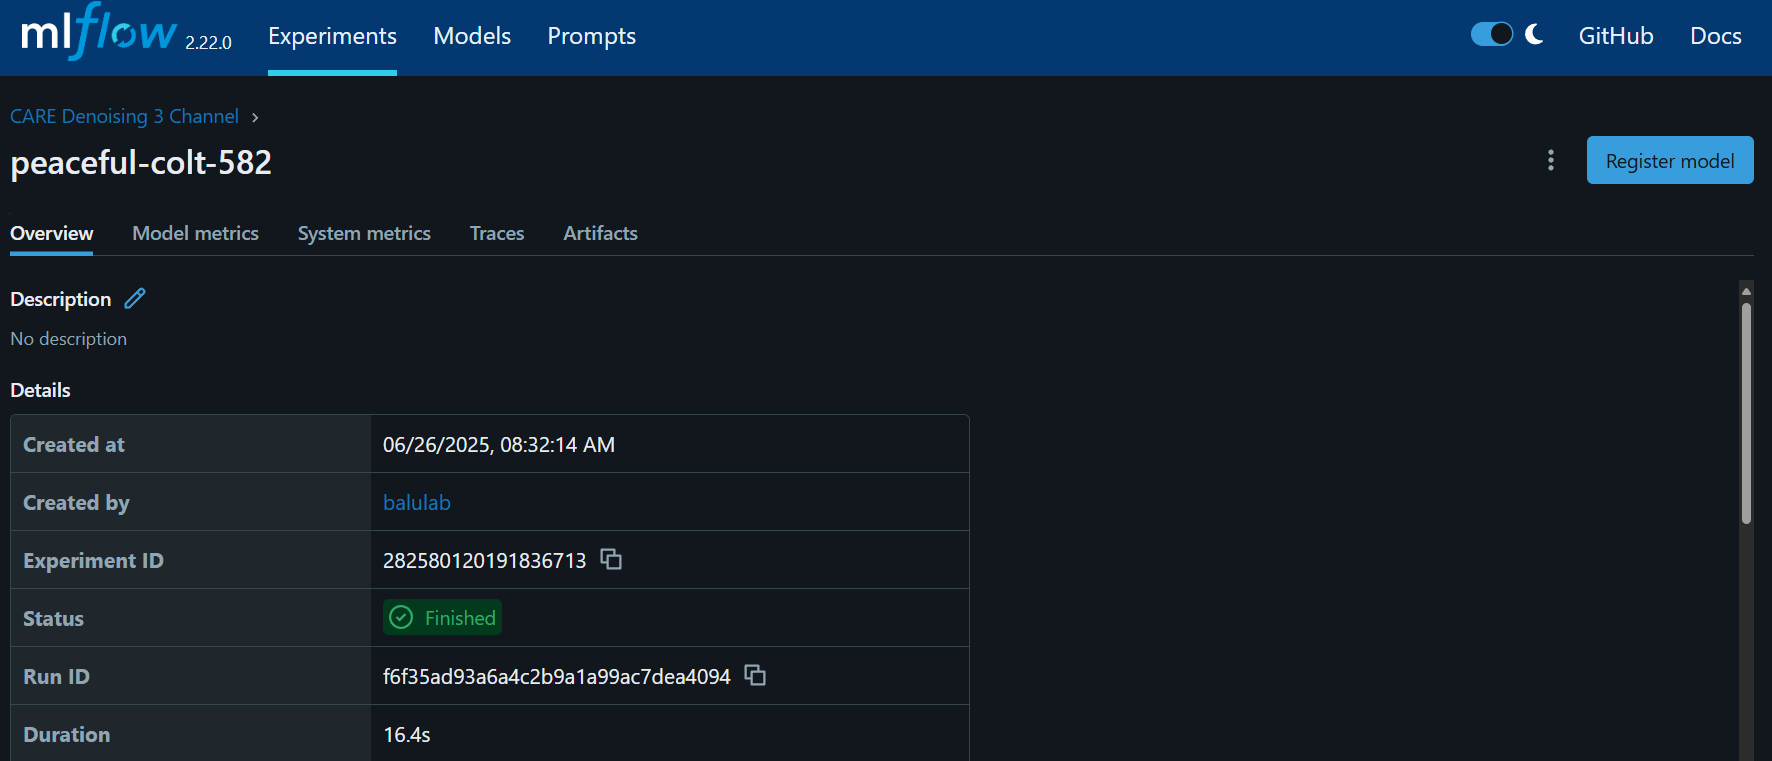
To register a model of interest, first click on it within the Experiments tab. An experiment run page looks like this:
Then, click the Register button, select the desired model registry from the dropdown, and hit Register in the popup.
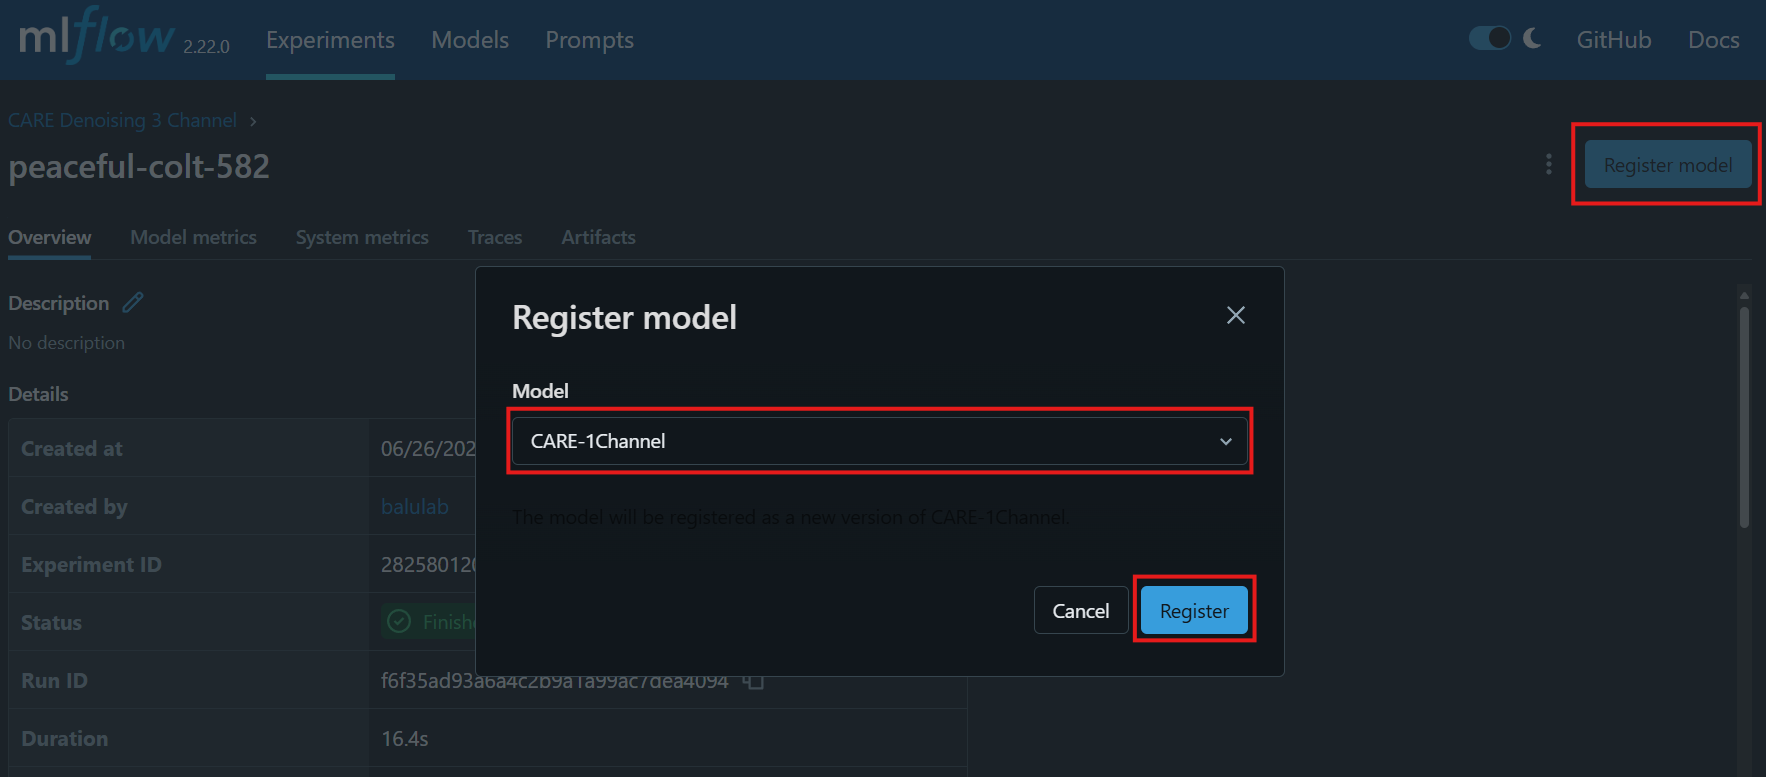
The MLFlow run will now be mapped under a version of the selected model registry in the Models tab!